
Last Updated on 8 months by Christopher G Mendla
Replacing a toilet tank lever should take less than five minutes. However, if it is badly corroded, the job can take a lot longer and you risk breaking your tank
Overview
The water in many water systems provides a harsh environment for the parts inside your toilet. This results in corrosion of metal parts.
I was replacing a flapper valve in my toilet. That should have been a quick, easy job. It was. However, in the process I noticed that the lever arm was badly corroded and just about ready to break. I decided to replace it rather than wait for the break which would probably happen sooner rather than later.
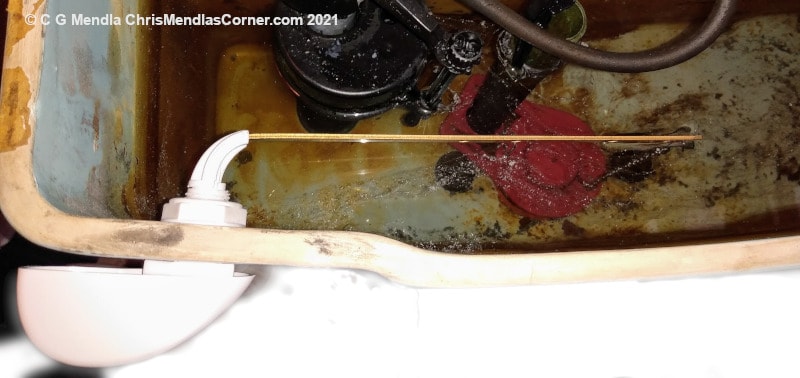
Replacing the tank lever and handle.
This should take less than five minutes. The handle is usually held to the tank with a nut on the inside. NOTE – the nut has a left handed thread.
Many of the handle fittings and nuts are made of die cast metal. Years of exposure to the chlorine and minerals in the water will result in corrosion.
The nut in my case was firmly seized. I tried some WD-40 but that didn’t work. Things were compounded by the fact that the nut was thin and didn’t allow a good grip with a wrench or a pair of pump pliers.
You need to be VERY careful working because if you slip and hit the porcelain, you will probably crack the tank. I really didn’t want to be replacing the toilet at 6 pm on a Sunday evening.
I tried a compact hacksaw to cut the nut. However it was going a bit slow.

NOTE – It is VERY EASY to crack the toilet tank. Shut off the water and use care.
Dremel to the rescue
I decided to cut the nut away using a Dremel tool. I drained the tank and put some towels to keep the Dremel from dropping into the water if I lost my grip on it. A smart person would have used a GFCI outlet in addition.
The idea is to carefully cut the nut so you can pry it off. I went through approximately six broken cutting wheels before I could cut the nut enough to pop it off You should be sure to get the pieces of the nut and broken cutting wheels out of the tank as neither degrade quickly in the waste lines.
I was working slowly and carefully so the process took about a half hour. I still had all my fingers and thumbs and didn’t experience the thrill of a 110v shock. Even better, my ancient toilet tank was in one piece.
The process was somewhat similar to Removing a stuck and broken reducing bushing from a galvanized drainpipe.
Plastic vs metal.
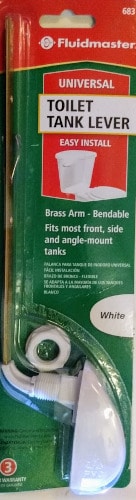
Before starting on the job, I took a quick run to our local hardware store. I was almost going to purchase a tank lever that had metal threads and a nut. I happened to look up and saw levers with plastic thread and nuts. A little voice in my head kept saying “Plastic doesn’t corrode”
I opted for the Fluidmaster 683 with a white handle. I could have gone for the chrome which would have probably looked a little better.
Note that even though the threads and nut are plastic, the lever arm is brass. You can purchase plastic toilet tank levers online.
Installation
The installation was a snap. Just be sure that you don’t overtighten the nut and break the tank. Also remember that the nut has a left handed thread.
The new flapper and new tank lever resulted in a perfectly functioning toilet. One of the good old 55 gallons of water per flush that would have Greta whatshername vomiting.
OK, so the inside of my toilet looks like something out of a dingy 1950’s gas station toilet. If a visitor doesn’t like it, they can pick a tree in the woods.
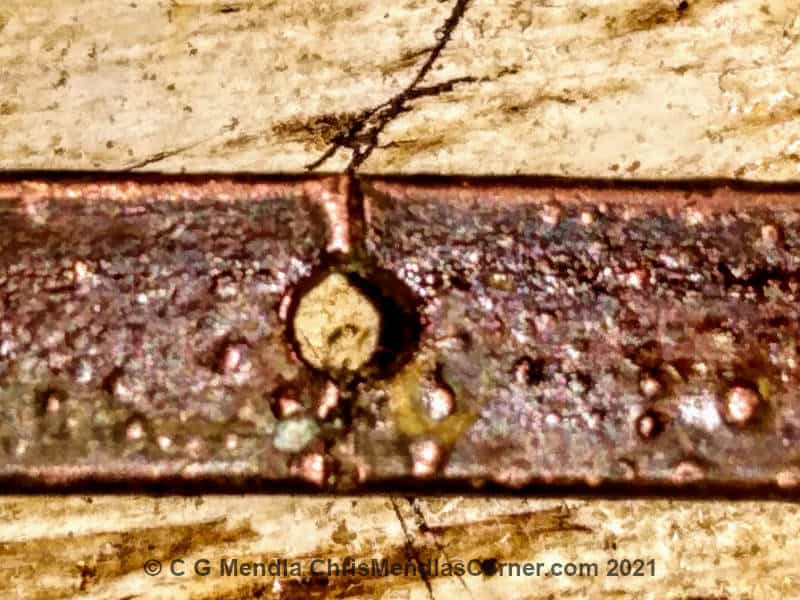
Corrosion – Nemesis of Plumbing
Below is a closeup of the old lever. A weak spot caused by corrosion is what appears to be a cut.. The tank will have dissimilar metals which will lead to electrolysis. The stainless chain for the flapper will win an electrolysis battle with the brass or copper of the lever arm every time.
An ounce of prevention
My Todo list is growing to the point where it’s not pages any more, it is volumes. As a rule, I don’t generally replace things until they really need replacement Given the aggravation on removing the seized nut on the lever I might want to check out my other toilets. If they are metal and I can get them off easily by soaking them with penetrating oil, then I will replace them with levers with plastic hardware. That way, when I go to replace them a couple of years from now the job will be a lot simpler.
After seeing what the tap water does to the metal plumbing I need to seriously think about installing a high quality water filter.
