

I had to relocate the drain for my upstairs bathroom vanity. The wall was ceramic tile on mortar. Since that part of the wall will always be hidden inside the vanity cabinet, it could be a little ugly. I needed to make a new hole for the drain that was about 2 inches in diameter.
This post is provided without warranty and the user assumes all risk. Be sure that any plumbing meets your local codes. .
Wear eye protection and a respirator.The drills WILL get hot.
The problem
I had a problem with the bathroom sink drain and vent stack. The bathroom sink connected to the vertical stack. That provided drainage for the sink as well as the vent for the rest of the household plumbing.
I needed to replace a 5′ section of 1 1/4 galvanized drain pipe. Rather than mess with threading pipe, I went with 1 1/2 PVC. I figured that the larger pipe might be more resistant to clogs in the future.
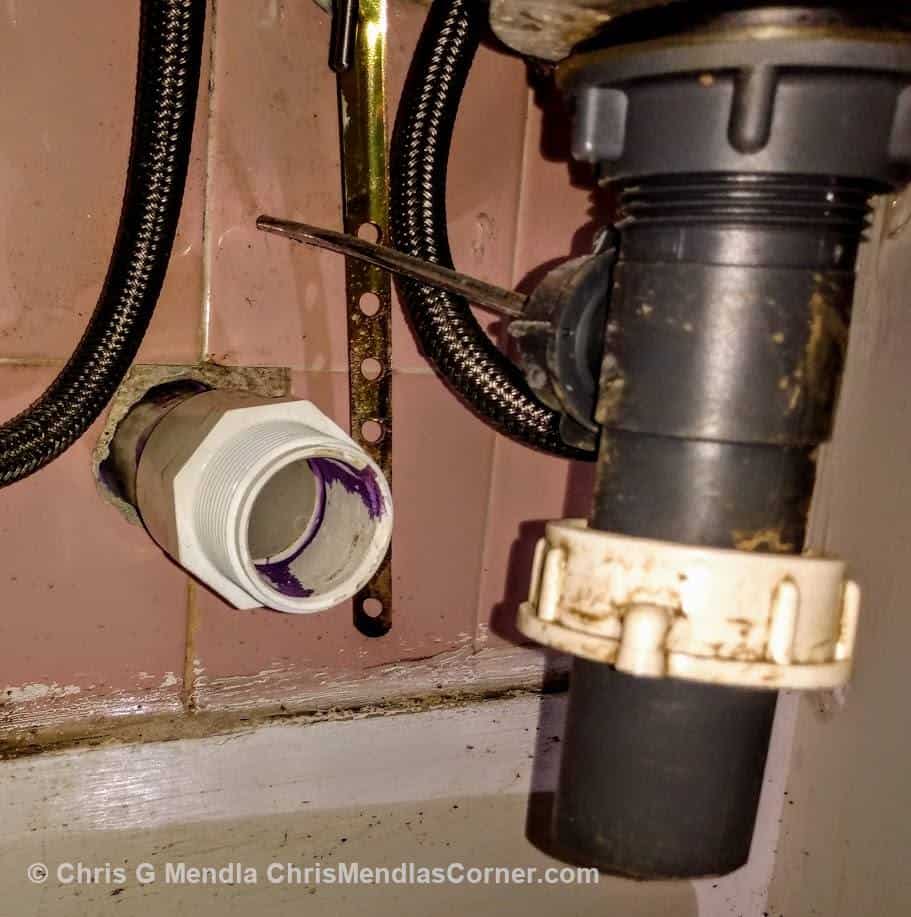
Because of Covid-19 related shortages of plumbing fittings, I could not get the normal trap adapter. I figured I could use a PVC pipe to thread adapter. That would have worked except that it extended into the cabinet further than a regular trap adapter. That made it impossible to connect the sink to the drain pipe with a proper trap.
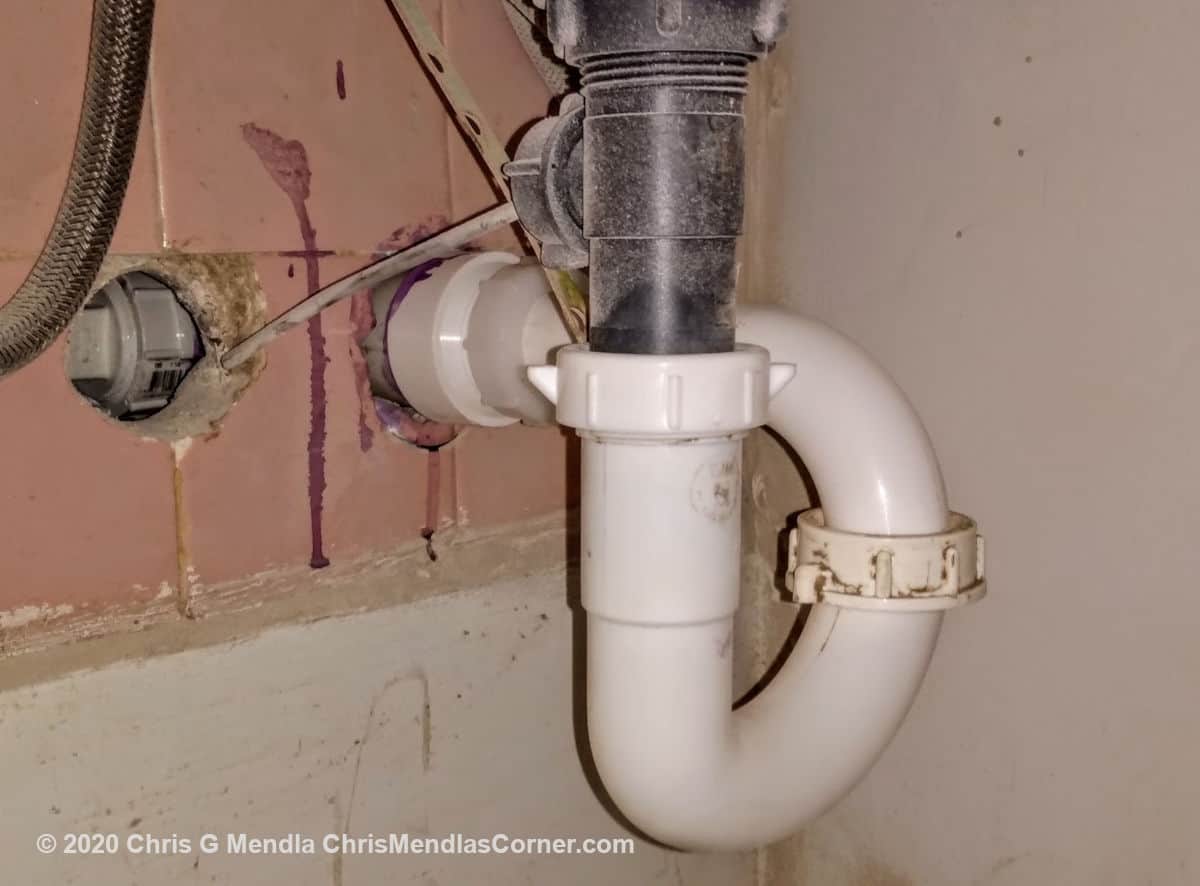
A flexible trap was a possibility but I wasn’t sure how clog resistant that would be. Below you can see that the outlet from the wall was too close to the tailpiece.
The plan – Add another hole.
After looking at the problem, a second hole seemed to be the answer. I was a bit reluctant to do this as it would require cutting through 2″ of wire backed mud and the tile.
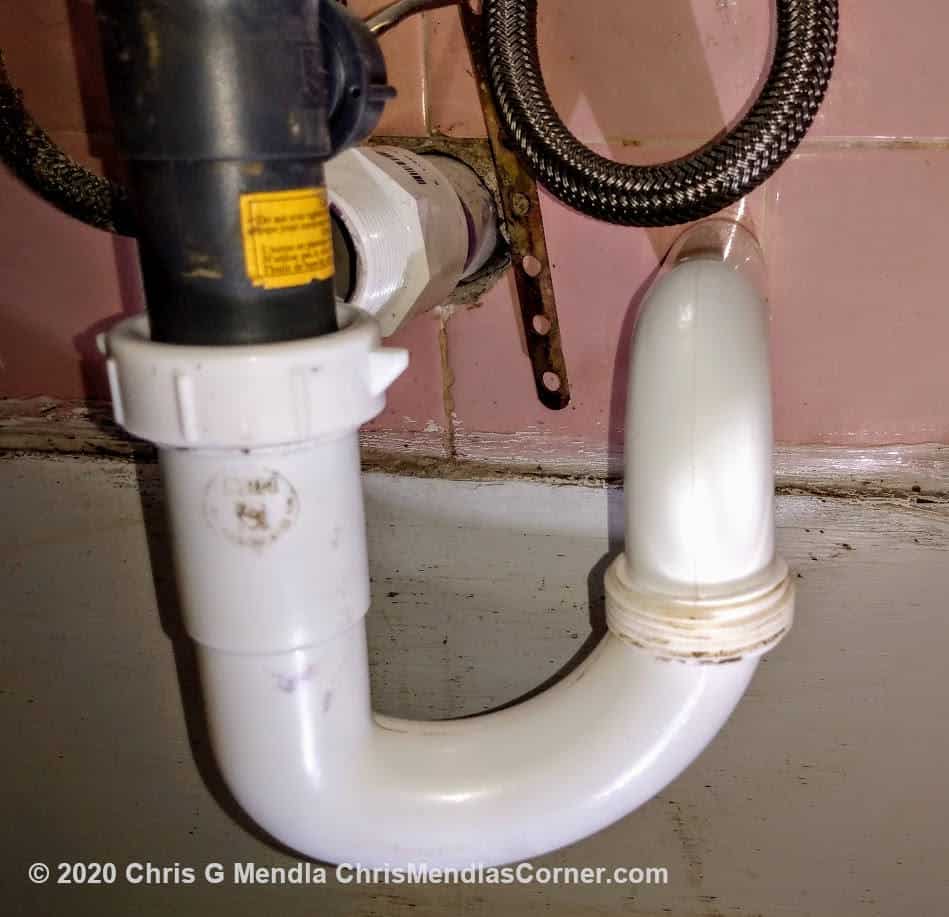
I connected the U and P pieces to the tailpiece and was able to get close approximation of where I needed to put the hole.
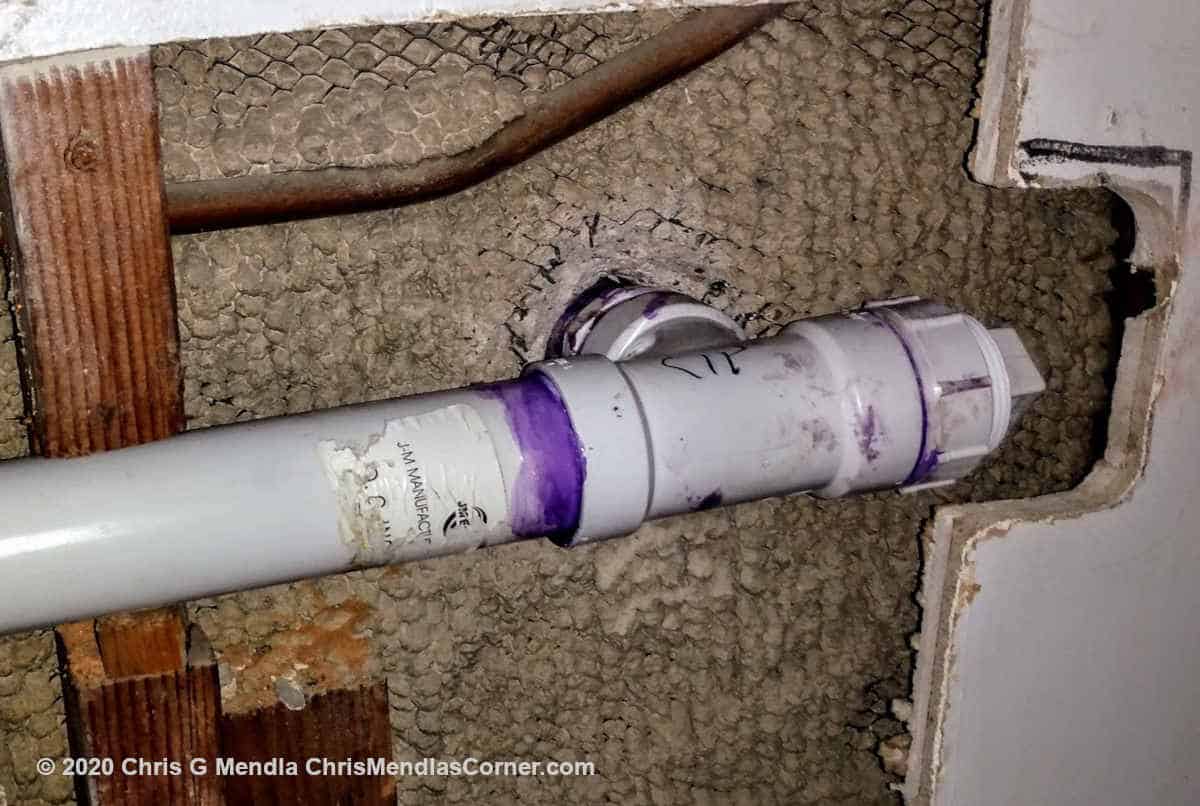
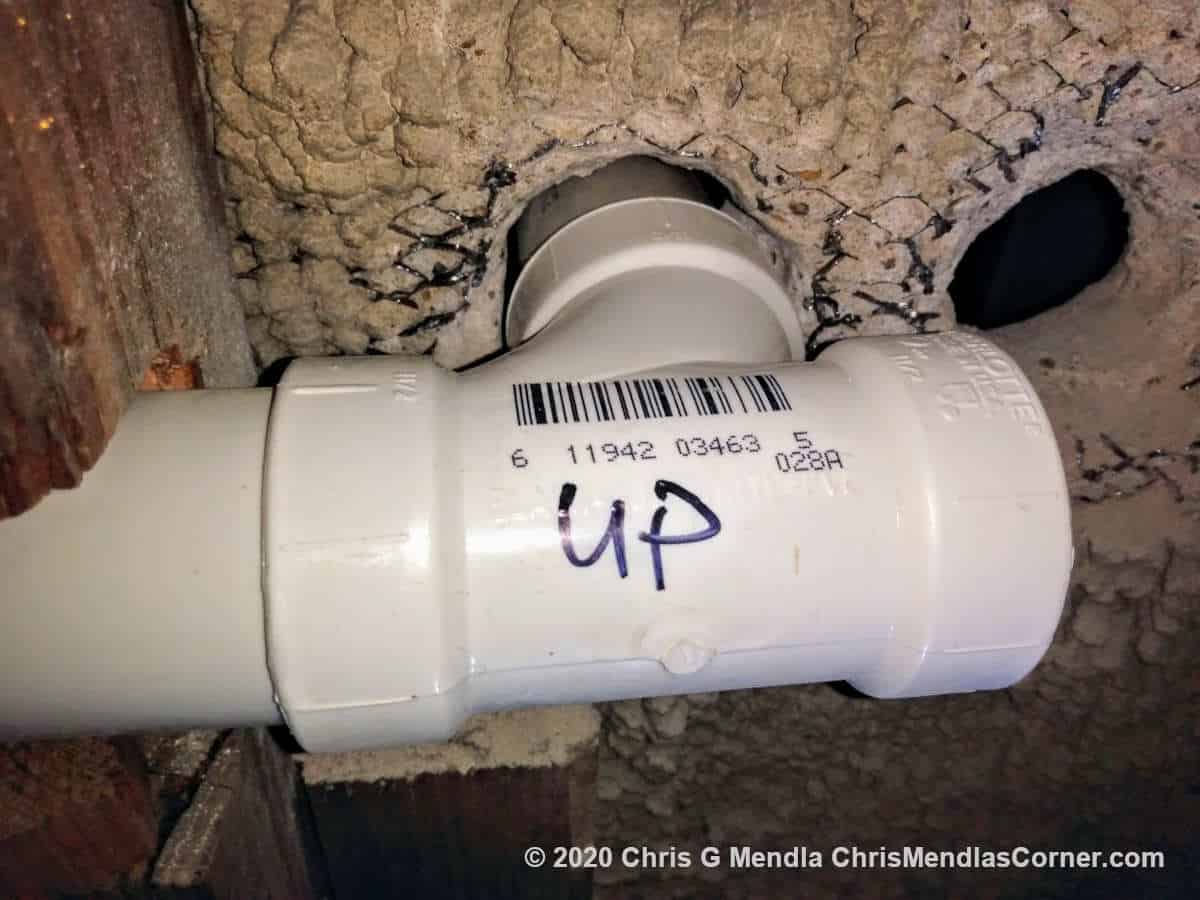
I looked at the back of the wall and saw that there was enough room to add a second hole. You can see the original hole to the right and the new hole with the fitting going through.
Drilling the hole
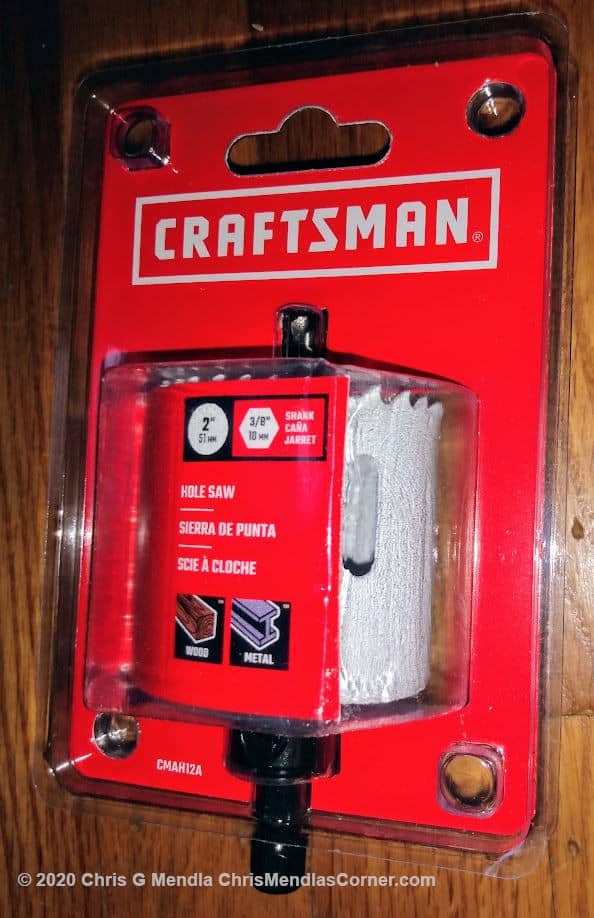
The best way to make the hole would be with a ceramic/concrete hole saw. I wasn’t able to locate that in the hardware store. I purchased two 2″ wood/metal hole saws for about $13 each. I knew they would burn out quickly but they would serve my purpose. Note that this was the heavier hole saw instead of the standard thickness.
I came through the wall with 1 1/2″ PVC. It was a bit of a tight fit. If I ever had to do it again, I would use a 2 1/4″ hole saw.
I drilled a hole with a 3/8 masonry bit where I thought the center of the hole should be. As you can see below, I was a little lower than I should be. I should have simply put a punch or drill through the hole to see exactly where it came through.
I wasn’t worried about drilling into the PVC as I would be cutting that part away anyway.
The Hole saw
The problem with the glazed tile is… well, it is glazed. The drill slips as you are trying to start the hole. You could probably punch the surface but here is where the hole saw comes in.
You will notice that I messed up and started to go lower. When I realized my mistake, I raised the center pilot hole.
Doing the pilot hole with a hammer drill was just about effortless except for getting the hole where you want. Once it is started, the drill went right through.
Once I had the pilot hole, I switched to the hole saw. The wood/metal center pilot did not have to bite through the tile and mortar.
WARNING – the hole saw will get VERY hot. (ask me how I found that out)
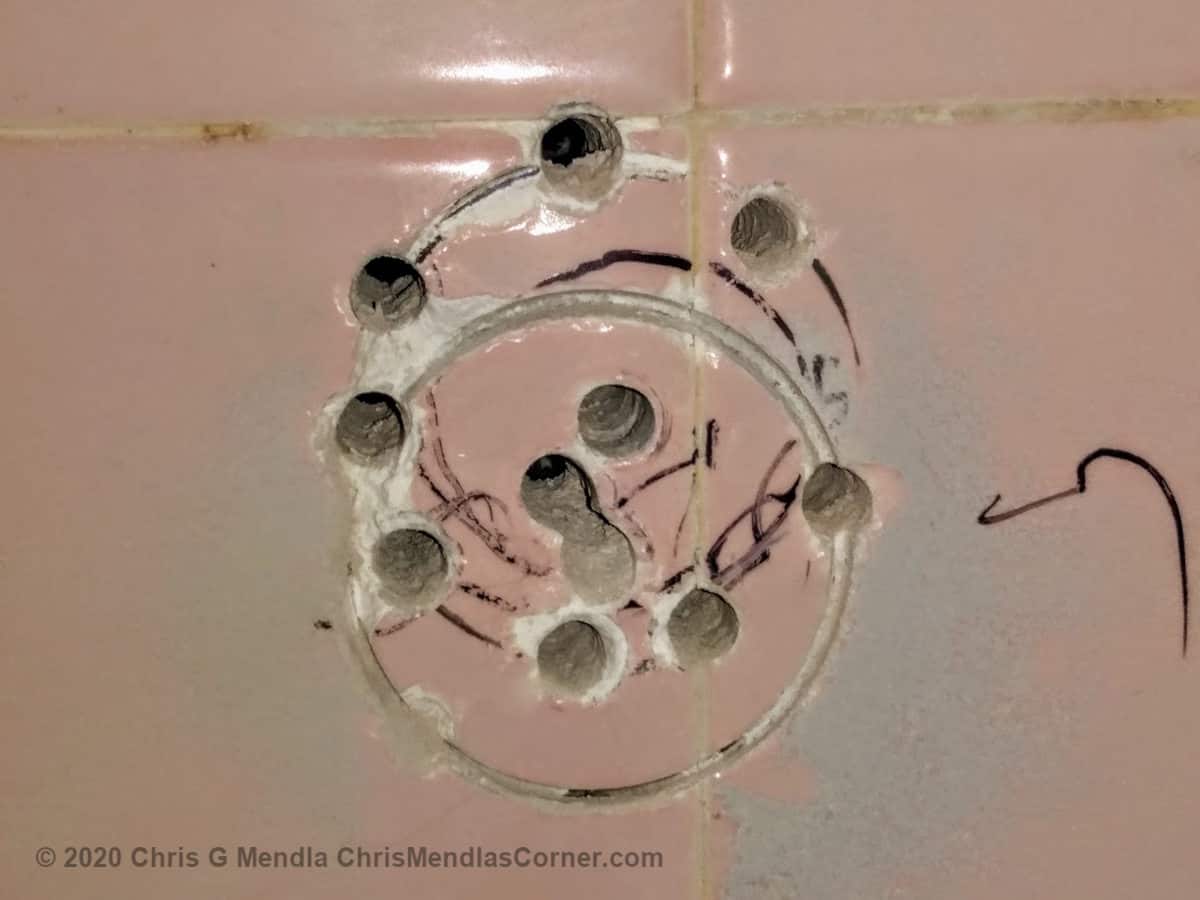
The idea is to go deep enough to score a circle in the tile. The hole saw will burn out quickly. I got about 1/8″ or less of a cut. Well, actually, I did that twice but it was a LOT duller on the second, correct cut.
The scoring helps keep the drill in place when you start the hole. I put eight 3/8 inch holes equally around the circle. It took about 30 seconds each with the 1/2″ hammer drill and a relatively cheap, but new, masonry bit.
Once I had those holes, I switched to a 1/2″ masonry bit going through the same holes I just made. At that point, I could simply tap out the center. You can see the 1 1/2 PVC behind the hole.
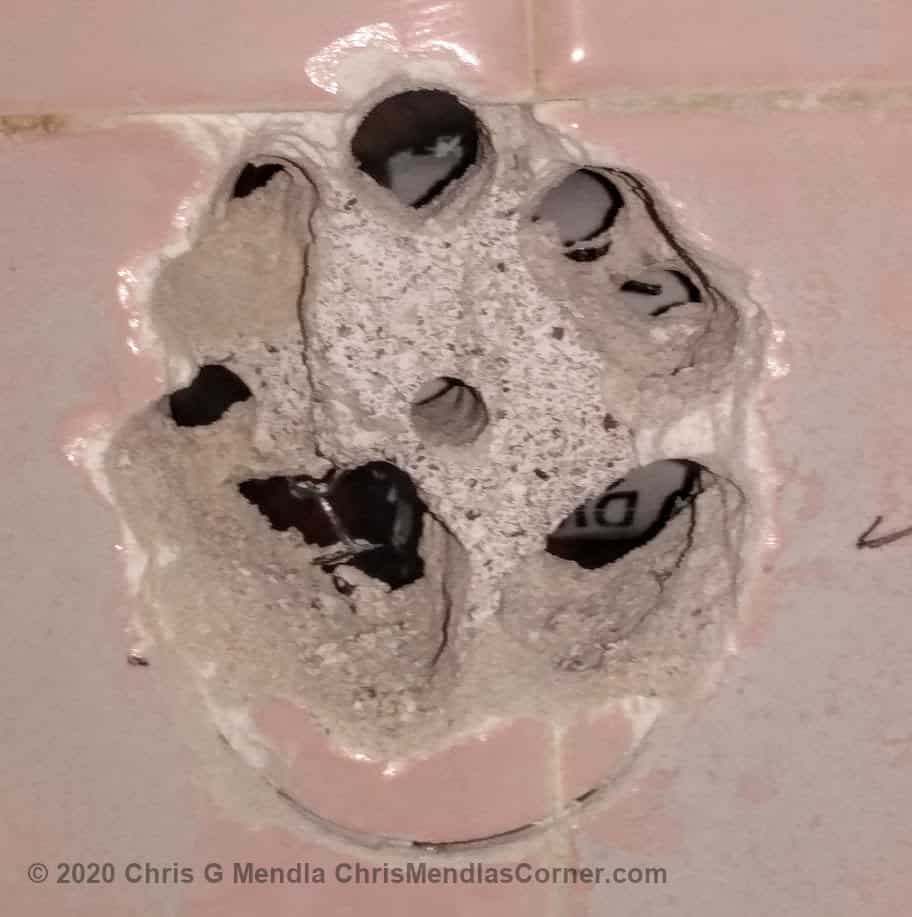
Tapping the center out resulted in a fairly decent hole.

I ran the 2″ hole saw through to clear some of the edges. A tack hammer helped clean up the hole. I also used a long punch. Careful use of the half inch bit cleaned it up a bit more. I had to bevel the mud a bit but the tack hammer and 1/2 drill worked.
Success – The P-trap connected easily
The result was that the P-Trap now connected properly to the drain pipe. you can see the old hole on the left. That was easily patched with some screening and mortar mix. The purple primer came right off with Goof off.
Summary
The job took some time but it wasn’t that bad. Tools I needed to make the hole included:
- Safety Goggles
- A respirator – You will generate a good bit of dust.
- A 1/2″ Hammer drill
- A sawz all to cut the old pipe
- A 2 1/4 inch heavy duty hole saw. You WILL ruin it.
