
Last Updated on 5 years by Christopher G Mendla
Cracks and Potholes in the driveway need to be filled. This part of the project requires a variety of materials and techniques.
See below for links to the other posts on this topic
A driveway in disrepair will have cracks of various sizes and potholes. These need to be fixed before applying the sealer.
Preparation
Powerwashing the driveway during your cleaning will go a long way to preparing the cracks and potholes. The powerwasher should blast most of the debris out. You can also use a torch to burn off any vegetation in the cracks.
In places with ‘chicken wire’ type cracking, determine if the cracks can be filled or if you need to remove that portion and treat it as a pothole. In some cases, a driveway might have multiple layers and the underlying layers are sound. I opted to, in most cases, kick the can down the road and try filling the chicken wire cracks.
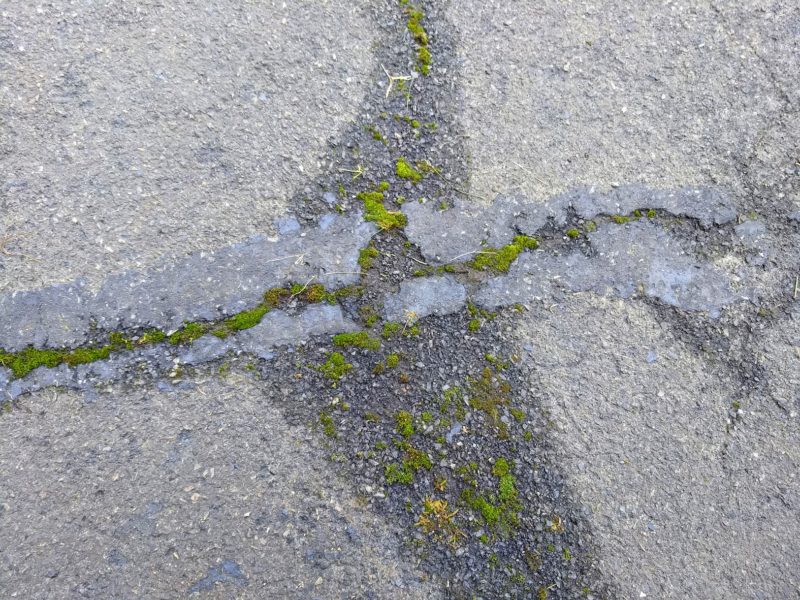
Cracks
Hairline Cracks
If the cracks are VERY thin, then the sealer MIGHT fill them. It is a bit of a judgement call.
Larger Hairline Cracks
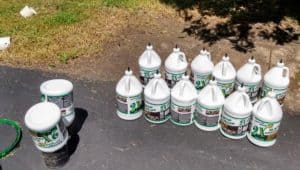
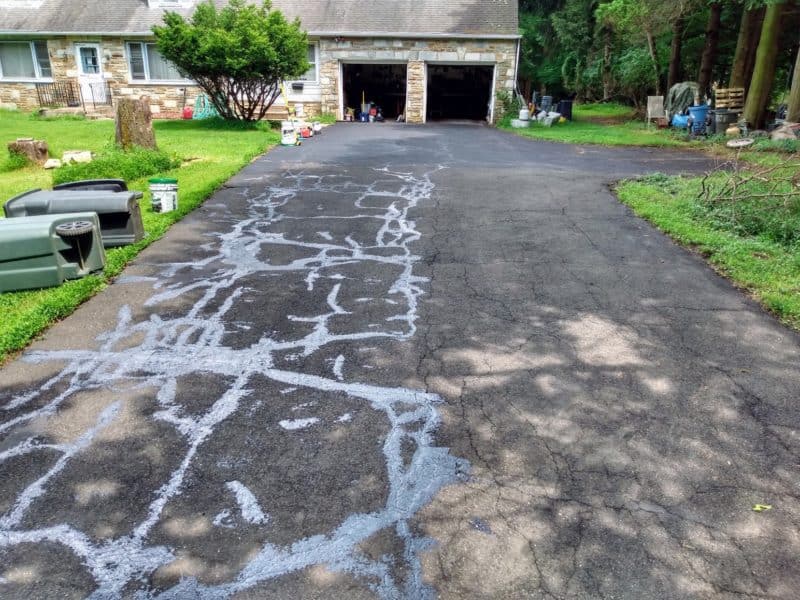
These will require a crack filler. I used Latexite 2x in gallon containers. There are a variety of manufacturers and products available. The Latexite products seemed to work well for me and were available from Home Depot.
The proper way to use the filler is to cut the tip slightly smaller than the cracks. I simply had too many cracks of varying widths to do it properly.
I cut the tip as wide as possible and used a spackling/taping knife to smooth it out. That results in a wide stripe over the crack that is a bit unsightly. My goal was to stabilize the driveway. Looks was a secondary consideration.
Methods:
- Leave the crack filler in as sunny a place as you can find. It works a lot better when warm.
- I used a 4″ drain pipe connector to invert the next two bottles I was going to use. That helps a little with the mixing.
- The directions say “Mix well”. LOL. I was using fresh bottles from Home Depot. After a while, I depended on warming and inverting them with minimal mixing.
- Simply pour the filler in the crack and smooth over with the taping knife.
Larger Cracks
I usedPli Stix for the larger cracks. That type of product comes in shorter lengths and buckets with a longer length. You cut it to size. PliStix is an asphalt ‘cord’ wrapped in plastic.
HINT – do NOT try to remove the plastic. It is designed to remain in place and melt when heat is applied.
Home depot only had the medium sized version. If you need to fill a wider gap, you can double it up. If you need to fill a narrower gap, leave it in the sun and pull it like a taffy. Wearing nitrile or latex gloves is advisable.
You can cut the pieces to length with a knife. In some cases, a screwdriver can help to get it into the crack. If you have a crack that runs to the end of the driveway, plug the open end with crumbled tinfoil
Once you have the cracks filled, fire up the torch. Some finesse is required here. If you aren’t careful, it will tend to curl away from the crack. There are a couple of things you can try
- Preheat the crack to encourage the filler to ‘stick’. BE CAREFUL, THE DRIVEWAY WILL BE HOT.. Really hot.. Like blister the heck out of your hands hot.
- Use a small flame at a distance to warm the filler up a bit and get it to start sticking to the crack.
- If the end curls away from the crack and you are using a big torch, you can probably blow it back to the crack by using the torch full force.
BE CAREFUL – The melted crack filler is hot tar and will cause painful burns if you come in contact with it.
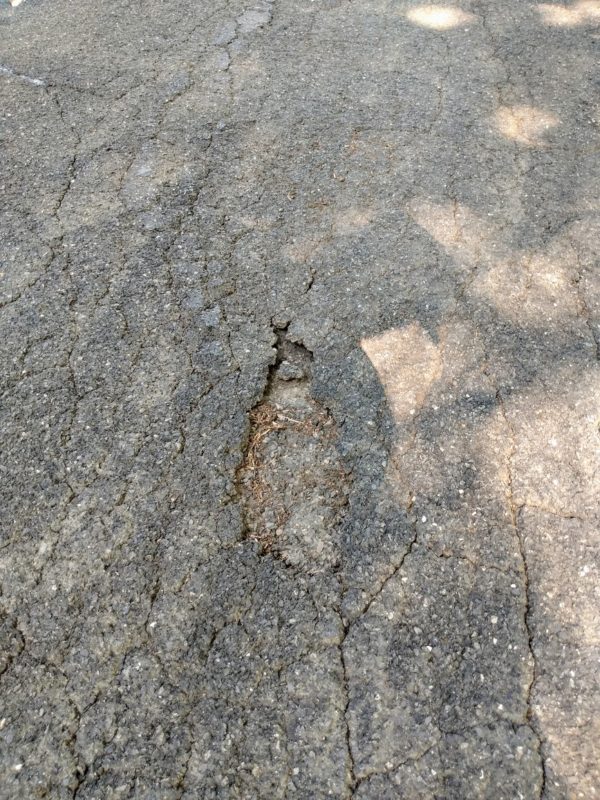
Odd cracks and small potholes
There were some cracks and very small potholes that I needed to fill. Trowable crack filler worked well for these.
The most important thing with this material is PATIENCE. If you apply too much, it will crack. You need to build the layers up in stages.
The product should be mixed. A 3/8″ corded drill and paint mixer should work.
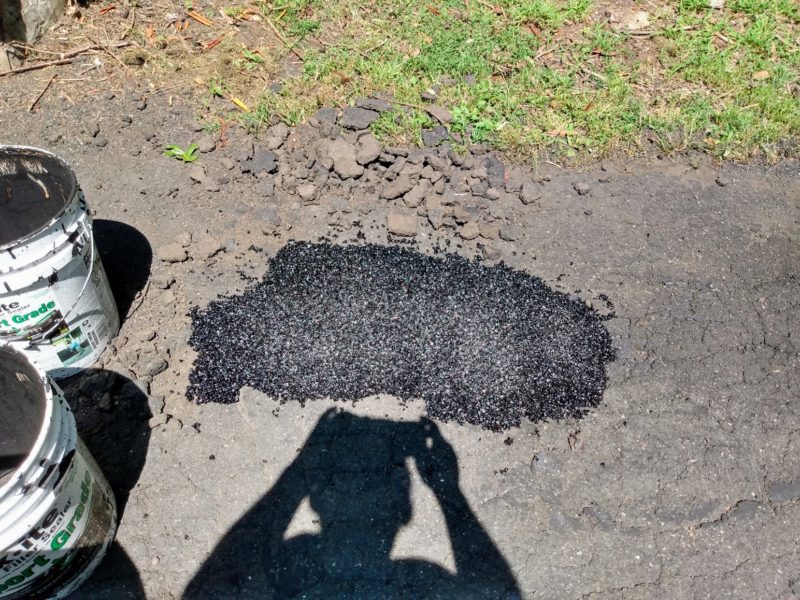
Large Potholes
Potholes of about 3″ in diameter should be filled with cold patch such as the cold patch from Quikrete. This product can make a mess of your clothes and shoes.
Apply the patch as per the directions. For smaller patches, a tamper should work. For larger patches, lay down a piece of expendable plywood and carefully drive over it.

Disaster areas
The end of my driveway is a mess. Cars on the street tend to use the driveway to turn around. They remain stationary while turning their wheels. This results in grinding up the asphalt.
I could fill this with about 5 bags or more of cold patch. However, I’m not sure how long that would last.
My plan is to use my cement mixer and bags of cement to fill that area which is about 10′ x 5′ by about 1/2-1″ deep. As I stated before, stabilization is my goal. Aesthetics is secondary. I plan on resealing the driveway in the spring so I can just apply asphalt sealer over the concrete.
- Feasibility
- Materials Needed
- Previous: Cleaning the driveway
- This Post: Patching cracks and potholes.
- Next : Sealing
- Sealing in cooler weather
