
Last Updated on 7 months by Christopher G Mendla
It’s that time of the year again. Time to remove the plow and put the cutting deck back on. This year, I had to replace a mandrel.
One of these days I need to look into what it would cost to have a shop reinstall the cutting deck. I have a feeling it will be more than I want to pay.
I have a Sears LT 1000 Lawn tractor. I bought that for about $300 used five years ago from a local lawnmower shop. I use it year round for cutting, mulching leaves and plowing snow. The basic process in the spring for me is
- Check the deck. See if anything needs replacement. Also, check the tractor including the deck clutch cable.
- Order parts
- Paint the inside of the deck.
- Replace the blades. While replacing them, check the mandrels (described below)
- Hang the deck and check it out.
- Level and adjust it if necessary
Check the deck and tractor.
Take a good look to see what you will need. Hopefully, you saved the hitch pins from last year. Inspect the mower deck belt. Look at the pulleys and brake pads. Check the clutch cable on the tractor.
Order Blades and other parts.
I use the tractor to mulch the leaves in the fall. I’m on 2 1/2 acres with about 1/2 ‘lawn’ and 1/2 woods. The woods have a lot of roots and rocks that come up every year. I don’t even think about reusing last year’s blades. I ordered a set of commercial grade mulching blades. I was pleasantly surprised as they seem a lot more robust than the blades I had.
Order any other parts you need. I THOUGHT I had a spare Mandrell in stock but it turned out to be the wrong part number.
Paint the inside of the deck
I’m not sure how much this helps but I generally put a coat or two of glossy spray paint. My thought is that this will help keep grass from sticking. You can paint it a color such as fuchsia or magenta to add humor value for the neighbors should you ever flip the tractor. Seriously, any color will do.
Replace the blades.
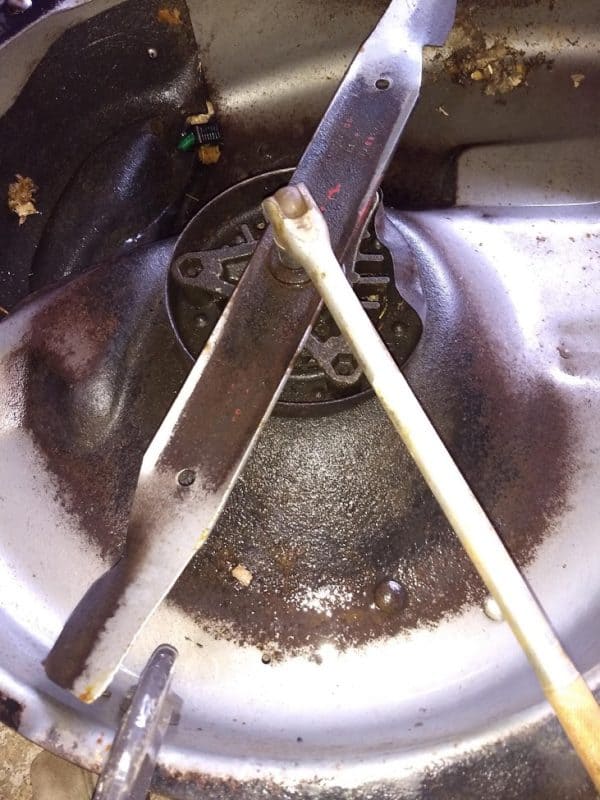
The best bet is to flip the deck over. Be careful as there are usually sharp pieces on the deck not to mention the blades. The deck is a bit awkward to handle. I use a breaker bar and the appropriate socket. A large C-Clamp on the deck will usually keep the blade from turning while you remove the retaining bold. You can see that the blades were in terrible condition (memo to self: check them more often). Also, you can see that the sheet metal around the spindle assembly is bent. That can easily be straightened with a pair of water pump pliers (I can hear real mechanics throughout the country puking)
Once you get the blades off, take a look at the star on the mandrel where the blade attaches. It should be sharp and well defined. If not, then you need to replace it. If you don’t replace it, the blade will freewheel.
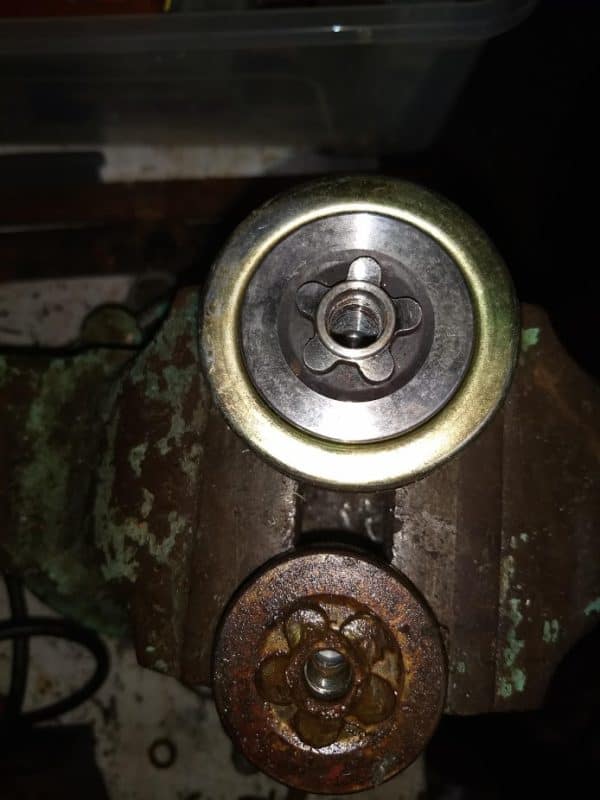
In the image above, you can see a bad mandrel at the bottom. The star is round and worn compared with a new mandrel above. The good mandrel was the wrong part number unfortunately.
I ordered a replacement mandrel. If I went through Sears Parts Direct, it would be over $40 and would take about a week to arrive. I purchased a compatible mandrel for $16 from Amazon Prime and it arrived the next day. The problem is that my yard is full of things for the mower to hit. I might as well break a $16 dollar part as a $40 dollar part.
BUT…..
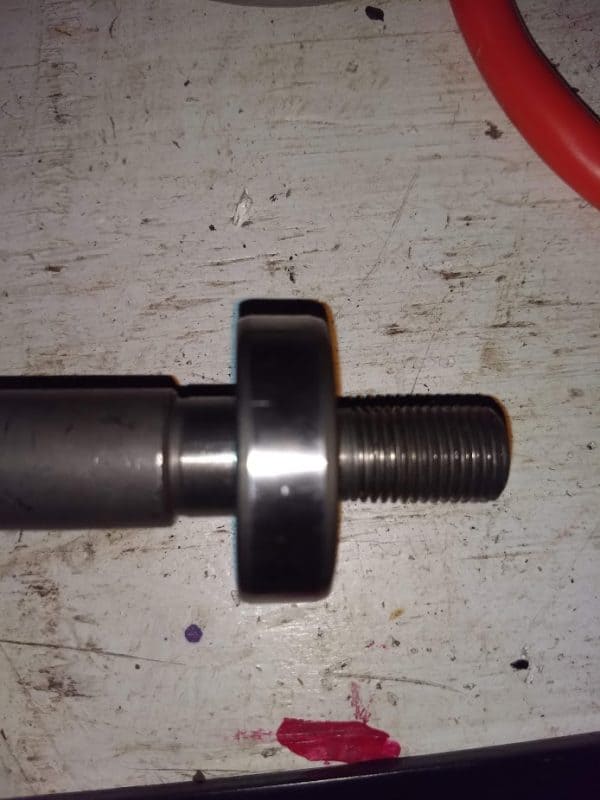
When I took a close look at it, I noticed that the bearing was not seating properly on the shaft. Below is the fit I expected. The bearing should seat in a way that the flutes are fully visible.
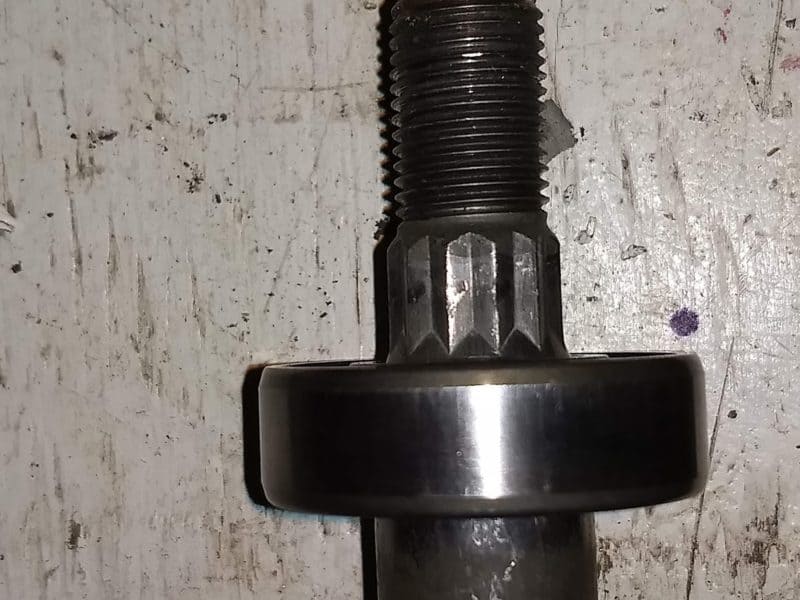
My newly purchased mandrel was a few thousandths of an inch oversized. The bearing did not fully slide into place. The flutes are not visible. You don’t want to hammer this into place. I
I was contemplating a couple of alternatives: Purchase another from a different source and wait a day or two. Purchase from the same source and take my chances or try milling it down. I chose the last choice.
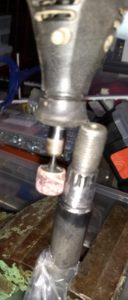
I tried my drill press to see if I could chuck it in and mill it with a file. That would help keep it from going out of round. Doing that would probably be a little dangerous. Fortunately my chuck would not take the shaft.
My next step will once again cause mass vomiting by machinists. I grabbed the Dremel tool and a sandpaper spool. I pushed the mandrel through a plastic baggie to keep any metal dust off the lower bearing. You need to make sure that you are clamping the mandrel in a way that isn’t damaging any bearing surfaces. The ideas is to go around the part you want to take down in a rhythmic circular motion. I could have used a micrometer to compare with the old mandrel. That part of it was still good.
You can always take more off but you can’t put material back. I went about 1000th of an inch more than I should have. I was wiping it off with a paper towel and fit testing the bearing. It only took a couple of minutes to get the fit right. There is a possibility that taking off too much material might cause vibration and eventual failure of the whole spindle assembly. My guess is that it won’t matte.r
I had to put the blade back on to hold things back while I removed the nut holding the pulley. Fortunately, there was enough meat on the star that it didn’t freewheel.
Check the pulley to make sure that the points are well defined and not rounded off.

If the blade doesn’t hold, you can try using a chain wrench on the pulley. Once the pulley is off, you can tap the spindle out with a rubber mallet.
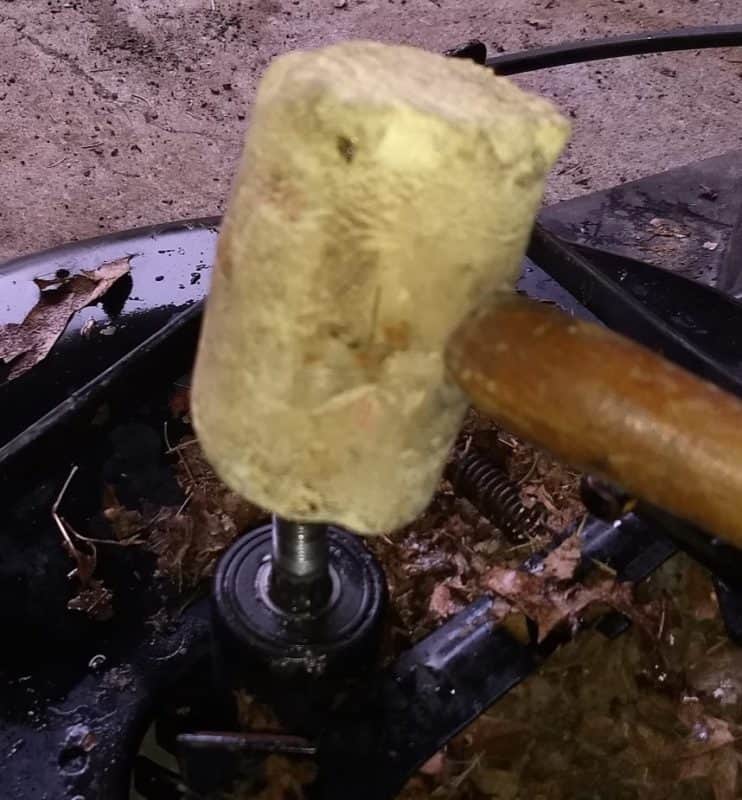
If you place the blade on the new spindle, you can use that to hold things in place while you replace the pulley and nut. Check the owners manual or documentation for the proper torque. I have a couple of torque wrenches which remained on the pegboard.
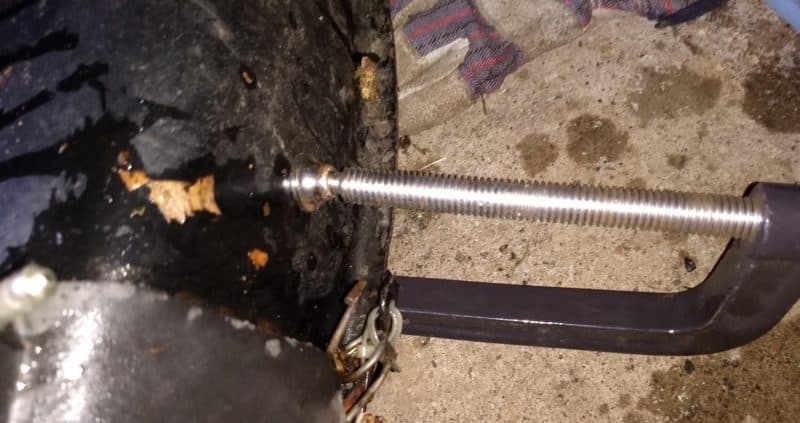
Once I had the mandrel and blade installed, it was time to mount it on the tractor. I had a problem getting the front bars attached to the tractor. The mounting flange on the tractor was bent to a good degree and the connecting rod would not line up with the holes in the deck and tractor frame. It was tough to get to so I used a 3/4″ pipe and small handheld sledge hammer to get it somewhat into position. I still couldn’t get things aligned. I bored the holes on the frame and deck with a drill. That was still a bit tough so I used a conical stone on an air powered die grinder.
(Things I learned) You need to use the stone in a way such that the tip is only in contact with a portion of the hole. If you try to use it in the same way you use a drill it will lock up. It didn’t take much grinding to get the parts to the point where everything aligned.
The final checks involve making sure everything is level with the deck. (yeah right) and then taking a test cut on a part of the lawn where the weeds.. er grass was really growing.
SUMMARY – Well, it’s working . I’m saving my nickels and dimes for another tractor. I’m not sure if I’ll go for something like a new Husquavara or Cub Cadet or just check with that dealer to see if they have another $300 tractor.
