

Last Updated on 4 years by Christopher G Mendla
I installed my woodstove in the basement of my 2 story Cape Cod. The problem was that when I would try to light it, I would get a downdraft and the basement and house would be as smokey as a 1960’s biker bar. Here is a relatively simple solution that allows me to start a cold stove in less than 10 minutes.
Overview of the problem
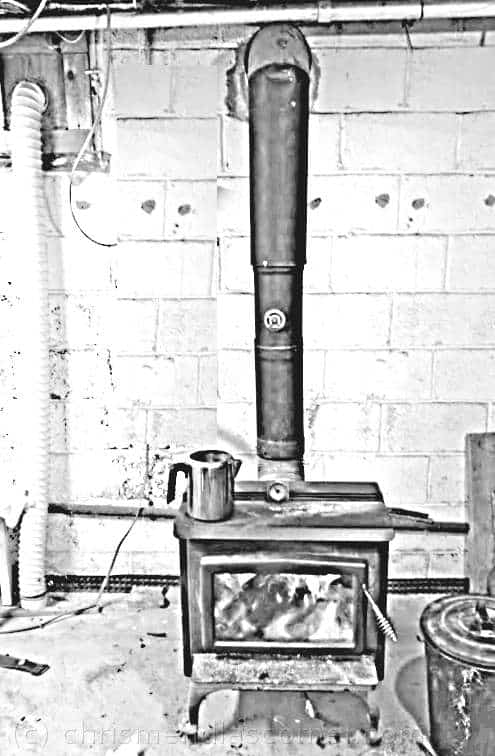
The stove installation is shown below. The point where the stovepipe goes through the foundation is slightly below grade. The window to the left is a well window. The exterior chimney goes up 2 stories. When I would try to pre-heat the stove, the column of cold air in the pipe would not budge. I would get a reverse draft and the smoke from the newspapers I was using to pre-heat would come back into the basement. We are talking a LOT of smoke. I tried using paper, fire starters, chafing dish fuel and just about everything else to pre-heat the pipe. I tried putting a small space heater in the stove door but even after 20 minutes, the stovepipe was still cold.
The other problem was that if by some chance I did get a fire going, I needed fresh air. However, if you opened the window at the top of the basement if would cause a reverse draft. The hot air in the basement wanted to rise and go out the window. That would result in a backdraft and the smoke coming back down the chimney into the basement.
The solution to smokey starts
The solution was the snorkel you see to the left. The components were:
- Dryer hose,
- A dryer hose fitting,
- Some 1×4″ wood and plywood,
- 1/4″ Plexiglas
- A hose clamp.
- Hardware cloth (screen)
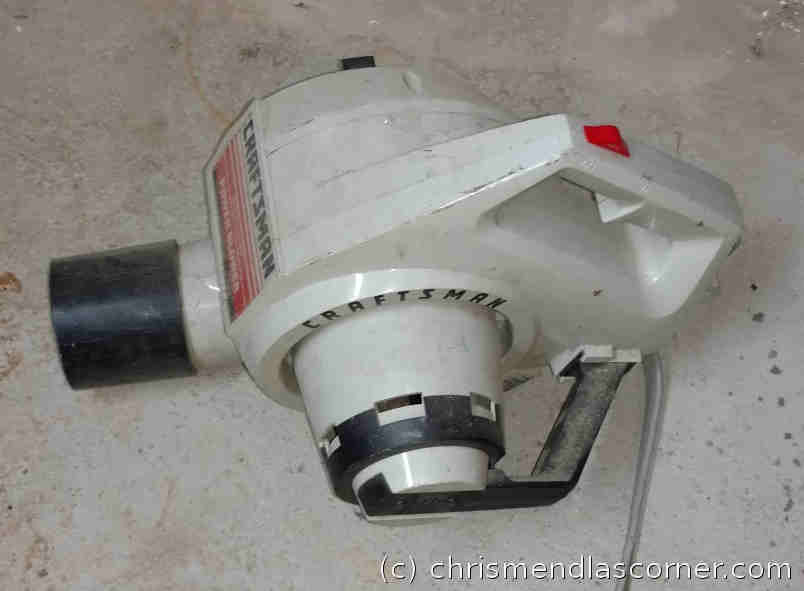
- Electric leaf blower (I used a one that I repurposed)
- Board to fit the stove opening
- Outside dryer vent.
I made the frame. Where the hole goes through for the hose, I added heavy screen to stop squirrels and mice and regular window screen to stop spiders and other bugs.
The covers for the window wells were a bit shot so plenty of air comes into the window well. If that isn’t the case for you that should be a simple fix.
The hose goes to about 1″ above the floor. I have it resting on a piece of 1×3 to ensure a gap.
Now, when lighting or running the stove, cold outside air is delivered BELOW the level of the stove which prevents a backdraft situation in the chimney.
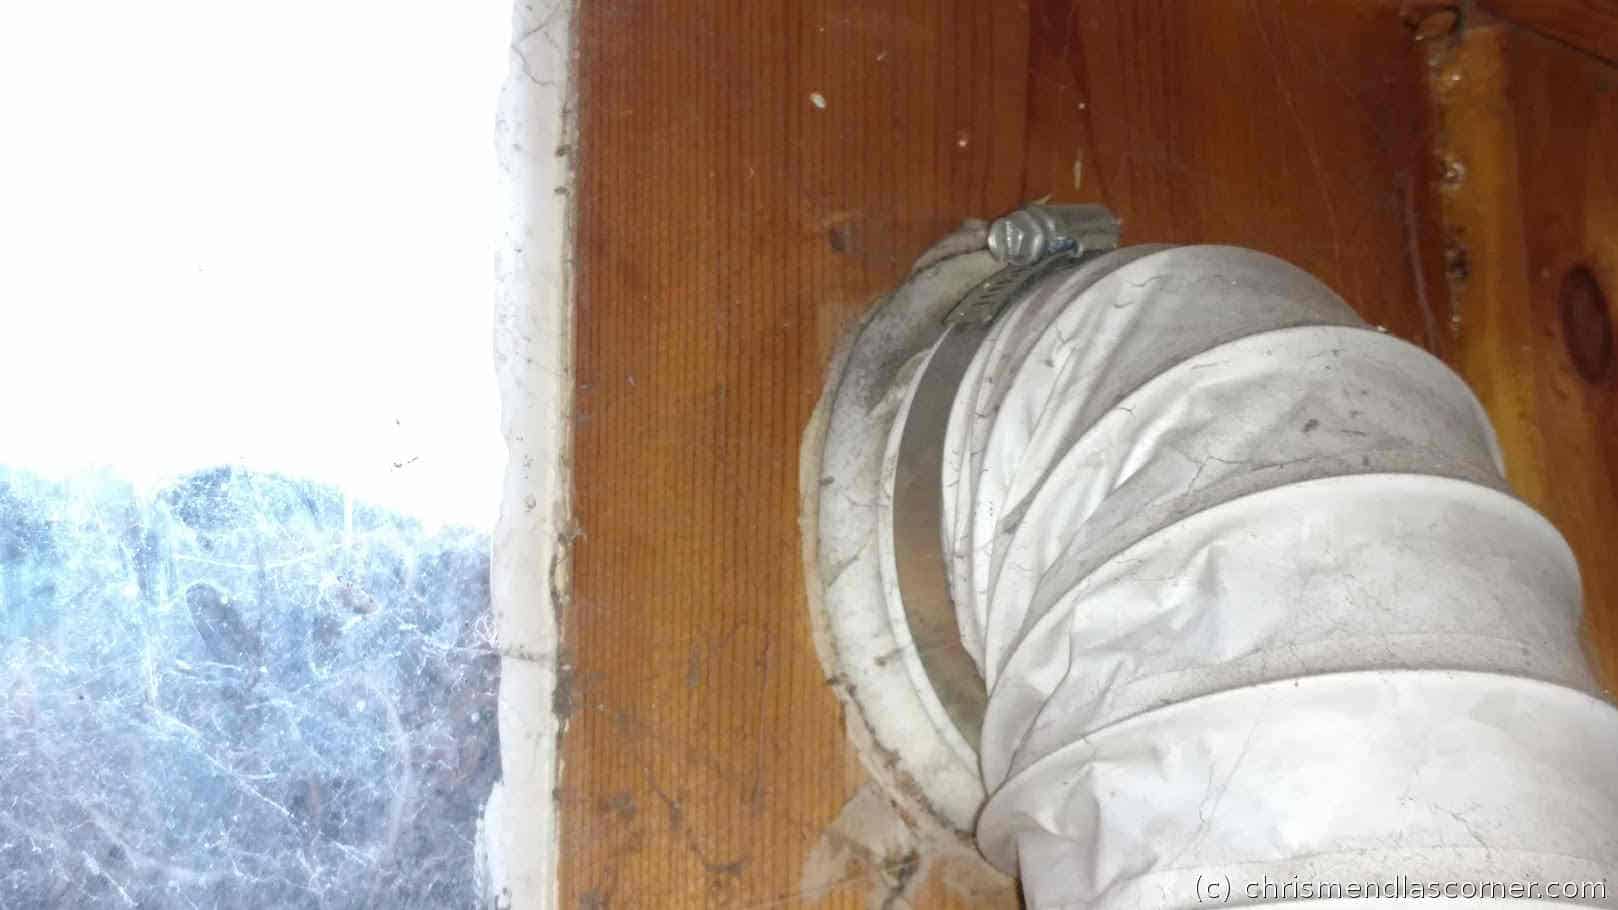
Here is a closeup of the dryer vent pipe.
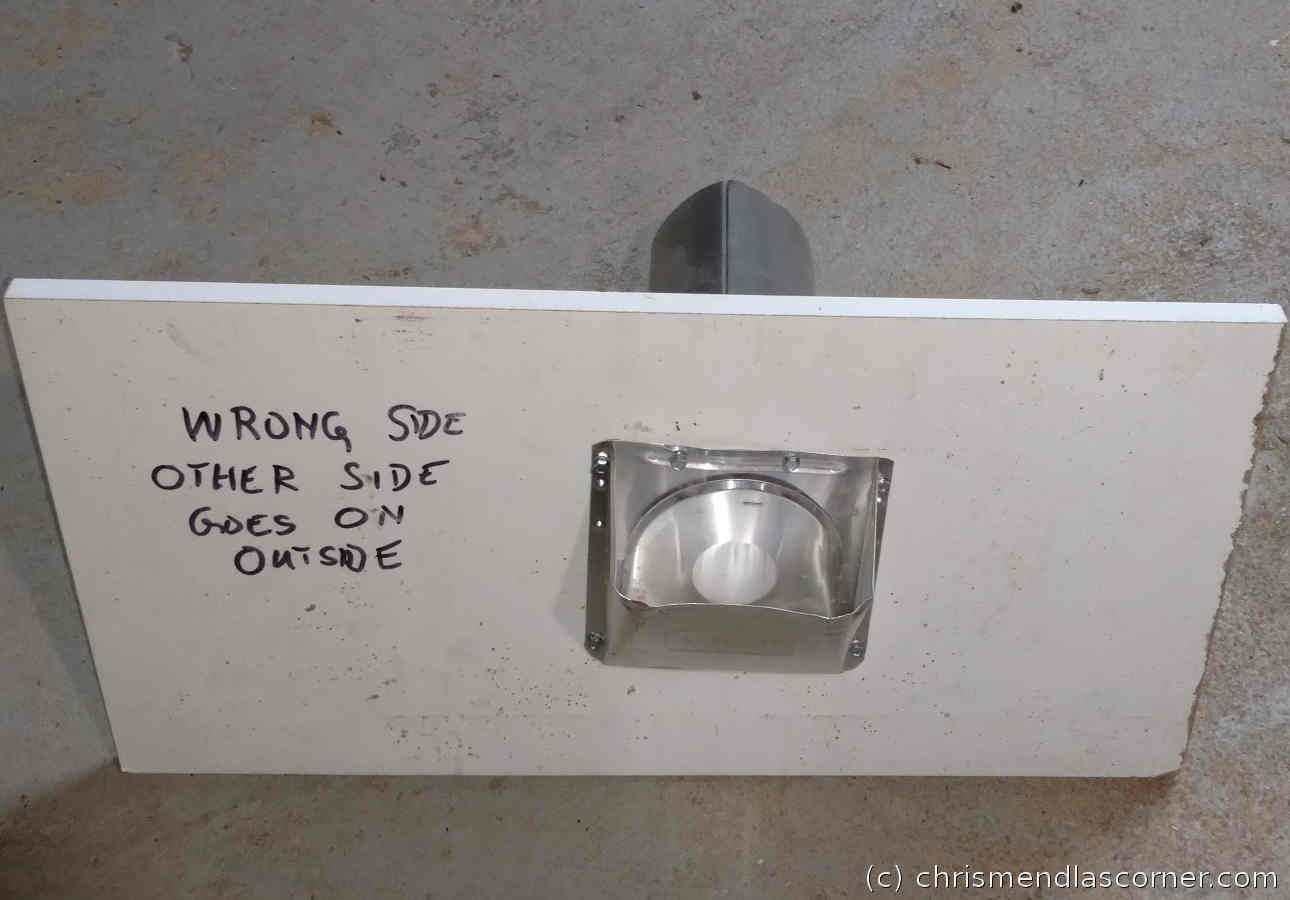
I still had to address the issue of preheating. I solved that problem by creating a plate for the door that would allow me to use an electric leaf blower to clear the frigid air from the pipe and replace it with room temperature air. The plate for the stove is shown below. It is simply a dyer vent pipe and a board that fits the opening of the stove.
DISCLAIMER —
- Do NOT use this if there are ANY live coals in the stove, even very small sparks. It is intended to bring a cold stove and chimney to a point where you can get the stove lit. Using it with live coals in the stove could start a house fire.
- Check to ensure that this complies with building codes
- Be careful.
The dryer vent helps direct the airflow upwards rather than down where there might be a lot of ash. Depending on how well it fits, you might find some ash escapes. You might want to put some tape over the sharp edge of the vent pipe.
The startup process for a cold stove now takes about 10 minutes tops.
- Make absolutely sure that there are no live coals in the stove.
- Clean out the ash, I screen the ash to grab the unburned coals and leave them in the stove. They light quickly and help start the fire.
- Carefully feel the stovepipe. It should be cold if you are starting a cold stove.
- Put the plate on the stove opening with the dryer vent opening facing up.
- Close the incoming draft on the stove.
- Insert the blower into the end of the pipe. In my setup running at half speed for 5 minutes almost always works.
- Carefully feel the stovepipe. It should not be cold but should be close to room temperature.
- Open the incoming draft
- Try a sheet of newspaper. The smoke should rise without coming back into the room. I usually burn a half dozen sheets or so. You need to get a small draft going. Otherwise, there is a possibility that the cold air could force smoke back down.
- Start your fire once you are sure you have a draft going.
Summary
As long as I follow this method and don’t rush the blower stage, I get a smoke free start. I found that five minutes seems to work. I have a cheap clock with a second hand on the wall so I am sure to give it a full five minute run.
